Installing a DCC decoder into an N-Scale Kato SD45
This document should help you understand the process of installing a DCC decoder in a locomotive that was not designed for it. I've done similar conversions to Bachmann and other locomotives. This is just a guide and not a step-by-step instructional document. Be careful before you start chopping up your $100 locomotive.
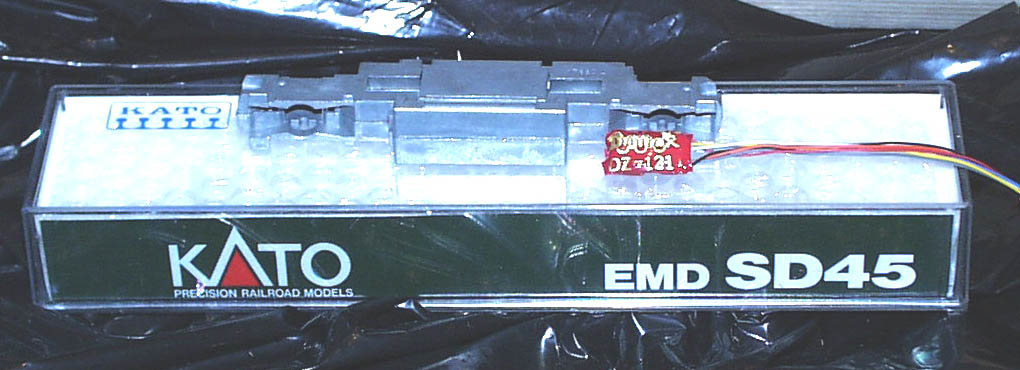
Here's what you'll have before you begin. Here's an older Kato SD-45 and a Digitrax DZ121 decoder. The larger Digitrax DN142 decoder will also fit in the SD45, but a bigger decoder means more work, so I try and go with the slightly more expensive Z scale decoder where it makes sense.
So where do you put this thing?
Pulling off the shell offers no help, its obviously not going to go inside the body shell.
The area under the fuel tank is solid cast metal, there's a lot of space there. Looks like this is the only option.
Completely disassembling the locomotive and just measuring the frame pieces suggest that the DZ121 will fit just fine in the fuel tank area. In order to do that, the metal must be removed to make room for the decoder. This will, of course, reduce the overall weight of the locomotive and reduce its pulling power slightly.
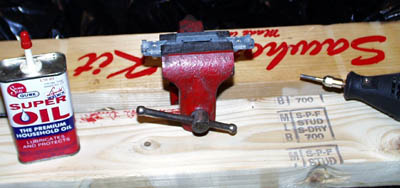
Now we know where the decoder is going to go, so its time to get ready! I carefully mounted half of the frame in a small vice, and covered the entire area with a plastic bag. You'll see why, this process is really messy! I use a tungsten carbide cutter in my dremel tool, and some machine oil to lubricate the work piece. The frame is a lot softer than the cutter, so the cutter tends to get clogged with the metal shavings. The oil helps reduce this but you'll probably still have to stop every now and then to clear chips out of the cutter teeth. Also since its flinging bits of oily metal around, it would be wise to take reasonable safety precautions.
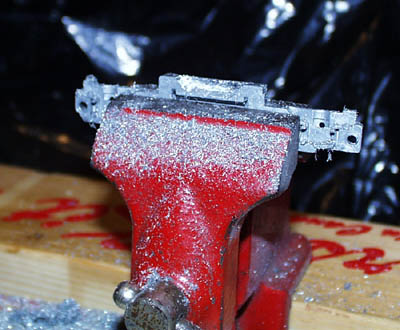
After cutting for a while, you can see the huge mess it makes, but progress is being made and you can see where eventually the decoder is going to fit.
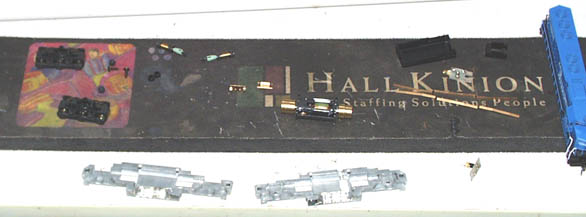
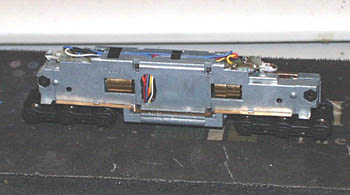
After the frame halves have the decoder area cut, I also cut access channels for the decoder wires. After the cutting operations are completed, I wash the frame pieces in soapy water to remove any metal chips. Then, I like to reassemble the frame, motor, and decoder to make sure that everything fits together. Check to make sure the motor brush contacts don't touch the frame, and that the frame doesn't pinch the decoder wires. Either of those situations will probably cause instant decoder death when you power up your track!
When you're done, you'll end up with something that may look like this. If you're paying attention you may notice that the white (front) light wire is actually going to the rear LED and vice versa. I wired the motor backwards, and it was easier to switch the LED direction than it would be to take it apart and reverse the motor wires. I also changed the stock yellow LEDs to white ones, which are a lot brighter and look much nicer!
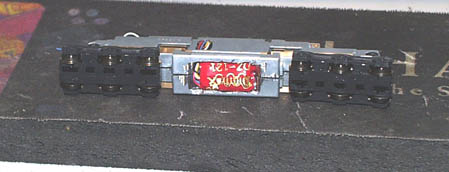
Looking at the fuel tank, you'll see how the frame's been cut away and the decoder fitted- its a tight fit even with the DZ121!
That's it. Its not easy but the results are worth the effort. Its a great running locomotive!
Any comments? Send me email!